Powered by WebRing®.
Showing posts with label baby. Show all posts

Tuesday, December 30, 2008

Two in One

Bonnets have been my theme this week. I sat down to make a bonnet for my dear niece and ended up just having to make another.

Selah's bonnet is a replacement for the newborn bonnet she has already outgrown. It is made out of the same high quality acrylic as her layette and has the softness of baby wool with the easy care her mama requested. Although the photos are not exceptionally clear, this bonnet is spectacular! I love the rose and petals detailing across the back and just can't wait to see my nieces sweet face poking out from beneath all those ruffles
This second bonnet is for a baby at church. I took a look at her sleeping face during Sunday school this week and knew she needed a bonnet too. Since her family is getting ready to move to a colder climate, the timing is perfect. I like the lacy effect of the triple crochet trim and the swirl back.

Wednesday, July 16, 2008

Baby Goodies!

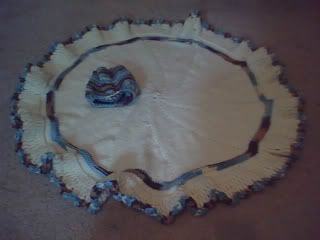
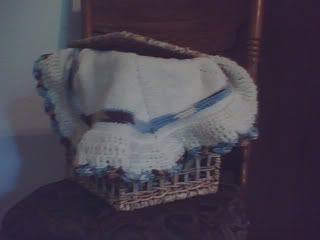
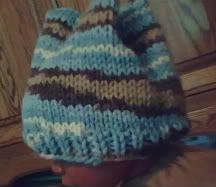
I just love making goodies for all my friends when they have babies! This is a set I've made for a friend who is due tomorrow. These are worked in worsted weight acrylic yarn on size 8 dpns and circular needles.
The center of the blanket is knit in the round as shown here http://www.knitlist.com/00gift/round-baby-blanket.htm until it no longer fit on my needle and then finished off with crochet. Using a size J hook I made row of single crochet (working two stitches in the same increse stitches used for knitting), two rows double crochet, and a shell edging (worked slip stitch, *dc second stitch from needle 5 times, slip stitch second stitch from needle* around).
The hat was a very quick knit worked as follows:
Using 16 inch size 8 circular needle, cast on 58 stitches.

Join piece and work in 1x1 ribbing for 4 rows.

Knit until entire piece is 5.5 inches. BO

Turn hat inside out, flat (BO edge to BO edge) and mark fold lines with pins. Refold hat so that the pins meet and once again mark the folded edges. This will divide the hat into fourths. Bring all pins to meet in center and pin so that the top of the hat has a star like shape. Whip stitch closed and turn right side out to hide stitching.